
Education : no32 'sharpen'
Someone mentioned to me that rotating a layer in a PSD will lose density but it's at such a low level that it's hard to notice. If you rotate quite a bit you do lose quality so as I've mentioned before always sharpen the final image. 'Smart sharpen' is the best tool to use for this since you have more control than the other methods.

Tuesday, 8 July 2008
Saturday, 28 June 2008
Education : no31 'Colour Map'
This is one of the more newer maps that texture artists use. I often come across people that have never heard of such a thing so I will just explain it's purpose as simply as possible. You should open up the following image while reading this.
1. So imagine this is say 3% of your asset. 5 plains that share the same UV's and texture. It tiles but it sort of looks bland.
2. On UV channel1 the UV's are 5 boxes overlaying each other but in another channel (usually 2 or 3) we have UV's for multiple parts. We make them so small so there is room to have a unique face for each plain. This is to be the colour map and is usually 1024 or 2048 pixels.
3. This is a zoomed in view of the top left corner of the UV map. The rest of the map will be filled with all the other parts of the asset, I'm just not showing them here.
4. Very crude but hopefully it puts the idea across which is that you can paint unique details onto each plain.
5. So now all 5 plains do not look exactly the same.
The whole process really is just an alternative decal method. I almost always have colour maps now for every medium or large asset.

Thursday, 19 June 2008
Education : no30 'Quick saving the diffuse'
When saving the diffuse for preview in the 3D app you usually 'save as' and select the image type etc but on those time consuming textures you can save time by going to actions in photoshop where you can 'record' an action so you just hit 1 button to save. Sometimes it can be off putting as it will suddenly stop working because it has changed the name of your diffuse (usually by adding 'copy' in the filename). If this does happen simply keep it and just temporarily change the root of the texture in the 3D app so it points to this 'copy'.
When saving the diffuse for preview in the 3D app you usually 'save as' and select the image type etc but on those time consuming textures you can save time by going to actions in photoshop where you can 'record' an action so you just hit 1 button to save. Sometimes it can be off putting as it will suddenly stop working because it has changed the name of your diffuse (usually by adding 'copy' in the filename). If this does happen simply keep it and just temporarily change the root of the texture in the 3D app so it points to this 'copy'.
Sunday, 25 May 2008
Education : no29 'Concrete Edgework'
Quick example here. On the left I've done edgework that almost contains the same tones and size. Edgework in generally should never be this perfect unless it's something very hard and new. On the right is an better example of how to go about doing it where there are shifts in tone and size on an edge that is clearly more broken/old looking.

Quick example here. On the left I've done edgework that almost contains the same tones and size. Edgework in generally should never be this perfect unless it's something very hard and new. On the right is an better example of how to go about doing it where there are shifts in tone and size on an edge that is clearly more broken/old looking.

Tuesday, 29 April 2008
Education : no28 'Normals advise for multiple element maps'
If you have different elements in your texture sheet, such as metal and wood, make sure to use the nvidia filter on elements individually. If you just desaturate a few diffuse layers and only use the filter once you will have the same nvidia filter scale for everything. When really wood and metal can require different scales to achieve the best results.
Right, am off to start playing GTA4 now. Might be a while till the next update ;)
Monday, 28 April 2008
Random : no8 'XNView'
Using the standard windows explorer to view images can be slow and problematic. XNView is one of the better image viewers out there, you can map certain folders to your favourites list. I'll usually have favourites set to my references, inspiration folder, textures folder etc. Available for free if you're not using it for commercial reasons.
http://www.xnview.com/
Sunday, 20 April 2008
Education : no27 'Finishing Textures'
Can't quite explain why but when working on a texture for days on end, day after day, you can get it in your head that the final texture is finished and will move on. You should always stick some adjustment layers to the top of your diffuse/spec laters such as levels and hue/saturation. It is likely you will not need to adjust the bars that much, just a few digits here and there. By doing this you can often find that by doing this your texture actually wasn't quite right before. Sharpening tools can also help a lot at this stage but be subtle and look at the texture carefully to make sure it hasn't 'damaged' any of it.
Can't quite explain why but when working on a texture for days on end, day after day, you can get it in your head that the final texture is finished and will move on. You should always stick some adjustment layers to the top of your diffuse/spec laters such as levels and hue/saturation. It is likely you will not need to adjust the bars that much, just a few digits here and there. By doing this you can often find that by doing this your texture actually wasn't quite right before. Sharpening tools can also help a lot at this stage but be subtle and look at the texture carefully to make sure it hasn't 'damaged' any of it.
Monday, 7 April 2008
Flashback : no5 'Unreal3 Map redo'
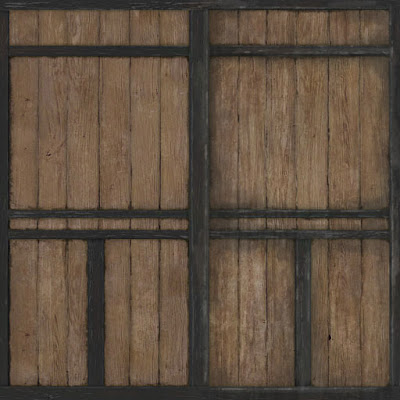
So below is an image showing wooden planks, on the left is the original texture I did and on the right I spent about 5 minutes quickly throwing in a few basic improvements just to give you an idea of what I would do if I were to do this again.
1. The dirt gather under the planks on the front was originally just intense and small. I added more by bringing out at lower opacity to give the texture more depth. Before, it just looked too flat.
2. Added an overlay using an image of water drips. This gives the texture more life and adds more tones. Before the lighter wood pieces had hardly any colour variation. This helps to break up the texture.
3. The edgework on the darker planks were originally more or less the same width. Here I added more lighter patchy areas (lower opacity) to break it up a bit more so its not just dark/light. There is now more ranges of tones making it seem much more natural.

Monday, 31 March 2008
Education : no26 'Q+A'
The following questions were asked on CGTALK earlier. I (quickly) jotted down some answers. Might be helpful to others as I remember having similar questions before getting in the industry.
1. How much do you get to paint diffuse maps these days on the current generation of games? I really enjoy this aspect of texture creation, but have been wondering if more and more has turned to photography manipulation.
Depends on the studio you work for. I worked on Overlord which was quite nice in that we mostly painted our textures and used photos as a very loose template if at all. Most stuff then is geared towards Photo real. However this isn't a big a deal as you may think, sure some games have textures where the artist just throws in a texture from a database and clone stamps it a bit etc but any decent games studio will make their artists use photos as a template/reference only. I still hand paint extra occlusion, edgewear, stains, dirt etc as well as often having the option to add new elements such as extra trim, hole handle, decoration etc
2. I have noticed that Zbrush is a requirement in many postings for texture artists job descriptions. What responsibilities do texture artist have using ZBrush? I mean what would be most beneficial to learn in Zbrush as someone interested in textures?
Zbrush still isn't essential to texture artists but it is getting that way so having experience with this or mudbox is a huge boost to your CV. At the moment zbrush is only used when having to plan out the layout of your texture without having to worry about matching it up in photoshop. Difficult to explain, a good example of using this is doing the camo patterns on a tank. You draw the outlines or simple solid colours of the patterns on your object in realtime in zbrush and then you can export the map and rerender it to your UV unwrap layout.
3. How much shader creation does a texture artist do? I have noticed that there are few options for creating textures for artists such as render monkey and FX composer. Do you use these tools or others if creating shaders? Could you recomend what would be best to learn to create shaders.
Depends on the engine we're using. If using unreal3 then we are usually expected to be able to create simple shaders. For more tricky shaders we would have tech/lead artists create them for us. You also need to know how to set up basic standard fx shaders in your 3D application so you can test normal/spec maps in your main 3D app.
Overal then it isn't vital to learn the tech aspects of texturing unless you're wanting to be a tech/lead texture. It certainly helps but it is more important to learn how to actually create great texture maps in the first place.
Tuesday, 25 March 2008
Random : no6 'DominanceWar3'
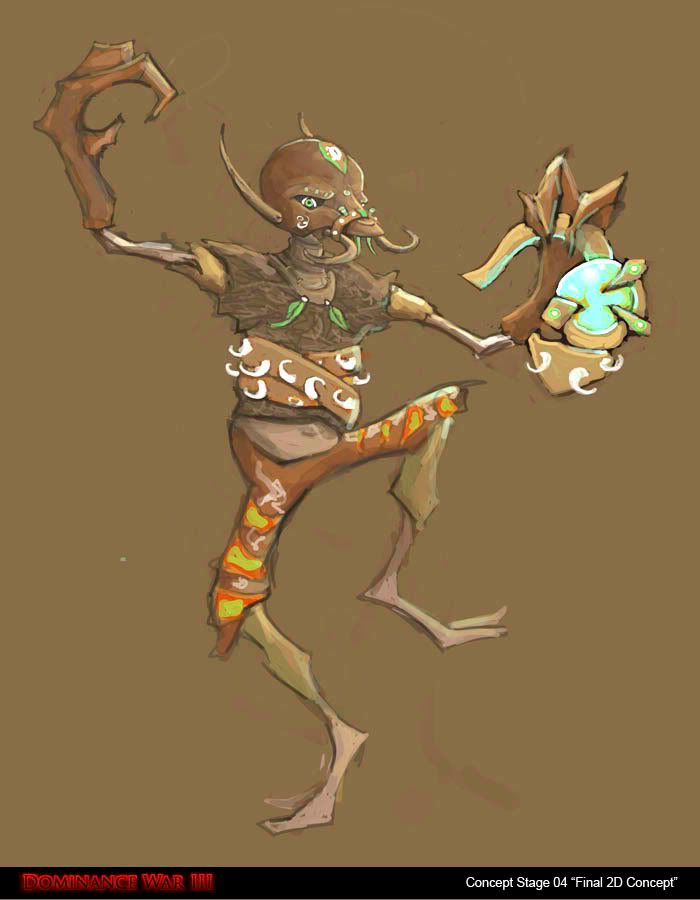
Entered into DominanceWar 3 this year. I'm hoping to at least finish the model but we'll see. Progress thread can be found at,
http://www.gameartisans.org/forums/showthread.php?p=30903&posted=1#post30903
Entered into DominanceWar 3 this year. I'm hoping to at least finish the model but we'll see. Progress thread can be found at,
http://www.gameartisans.org/forums/showthread.php?p=30903&posted=1#post30903
Wednesday, 5 March 2008
Education : no25 'Texture Artist Overview'
Recently wrote an article of sorts for gamedev sessions. It is aimed for people interested into getting into the industry. Explains what an texture artist is and what they do etc.
Here is a link to it, check out the other content on the site too I think it could grow into a rather useful collection of gamedev articles.
http://gamedev.sessions.edu/?p=11
Monday, 25 February 2008


Thursday, 7 February 2008
Education : no24 'Making maps/trims tile both 50% and 100%'
Often when building levels you need walls/trim etc meshes of various sizes. There could be a full wall and then half a wall as two seperate meshes for example. Now if you make a texture map that can tile it will work with the full wall but not the half wall.
1. Duplicate tiling wall/trim in your psd.
2. Offset 50% horizontal on your new layer
3. Softly erase both ends on this layer so the underlying layer and this layer transitions well.
4. Collapse this layer into the underlying layer to make one layer.
Now this will tile perfectly on both full walls and half walls. You can advance this method and have it so it will also work on quarter walls/trims if needed.
Sunday, 3 February 2008
Thursday, 31 January 2008
Education : no22 'Piclens by cooliris'
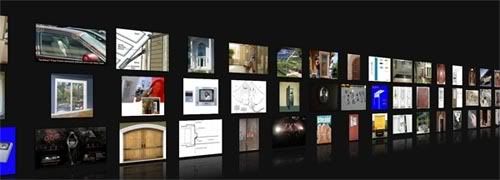
This is quite something. Free tool that you install into your firefox browser. Once installed and you visit google search you'll notice that when rolling over any image a blue arrow appears. Click on it and you will be instantly taken into this virtual dark room where you can easily navigate every image from your search. No loading and no page changes. Once you find a pic you can either printscreen or press a icon that thats you to the page with that image if you wish to 'save image as'.
You can also use this with other popular image sites such as flickr. Just try it because words just don't do it justice.
https://addons.mozilla.org/en-US/firefox/addon/5579
Wednesday, 30 January 2008
Education : no21 'Gradient Pass'
This is a useful trick for complicated environment meshes. I will use a box for this example to make it as straight forward as possible. First of all you need UV channel 1 to be mapped as usual and also need to have channel 2 unwrapped where no polygon is overlapping and has its own space (really cheap and nasty way to do it is to 'unpack uv's' in unwrap editor in Max). Add new material to your mesh (everything you want this effect on should be atatched as one mesh) Add a gradient map into the diffuse slot, feel free to play around with the settings to get the effect you want. Add a UV map, align it correctly and rotate the gizmo if needed in order to change the direction of the gradient. Now press zero key to bring up render to texture and render out a diffuse into map channel 2.
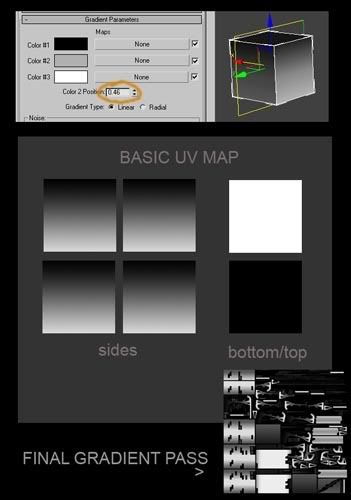 I have photoshopped the 'basic uv map' to show what you essentially get at the end. If its more complicated you'll get something like the example shown in bottom right. Now you can use this layer in Photoshop as a mask for dirt/grime/rust/moss. In max you can add noise by playing with the settings to make the gradient less perfect but you can also do that in Photoshop in various ways.
This is a useful trick for complicated environment meshes. I will use a box for this example to make it as straight forward as possible. First of all you need UV channel 1 to be mapped as usual and also need to have channel 2 unwrapped where no polygon is overlapping and has its own space (really cheap and nasty way to do it is to 'unpack uv's' in unwrap editor in Max). Add new material to your mesh (everything you want this effect on should be atatched as one mesh) Add a gradient map into the diffuse slot, feel free to play around with the settings to get the effect you want. Add a UV map, align it correctly and rotate the gizmo if needed in order to change the direction of the gradient. Now press zero key to bring up render to texture and render out a diffuse into map channel 2.
I have photoshopped the 'basic uv map' to show what you essentially get at the end. If its more complicated you'll get something like the example shown in bottom right. Now you can use this layer in Photoshop as a mask for dirt/grime/rust/moss. In max you can add noise by playing with the settings to make the gradient less perfect but you can also do that in Photoshop in various ways.Sunday, 27 January 2008
Education : no20 'Turning an difficult photo into seamless texture'
Neil Blevins provides 2 methods on how to fix this common problem after offsetting as shown in the image below
http://www.neilblevins.com/cg_education/brightness_var_tileable_texture/brightness_var_tileable_texture.htm

Neil Blevins provides 2 methods on how to fix this common problem after offsetting as shown in the image below
http://www.neilblevins.com/cg_education/brightness_var_tileable_texture/brightness_var_tileable_texture.htm
Monday, 21 January 2008
Education : no19 'Layer Managment'
2 years in the industry and I still don't have a fool proof guide on how to set up layers. I wish there was an universal way of doing it so that we instantly know whats going on when opening other peoples psd's. Everyone has their own style when it comes to layers. I hope to do more on this in the future but for now some of my methods.
'General' Folder
Have a 'general' folder with layers for dirt, scratches, rust/edgework, shadowing etc that are generally painted over the whole map. Before I would have something like dirt_objectX, dirt_objectY etc thinking it gave me more control but often I'd end up with multiple different layers for multiple types of general layer. Try to limit to yourself to one layer per 'general texture'.
Colour scheme
Devise a colour system for the main groups. I use red for diffuse, blue for normals and green for specular. You can expand on this to create your own little helpers. For example I sometimes add to the layer names what they will later be copied into. For example General_highlights (spec) or General_indents (norm / spec). It really depends how complex the map is.
'Normals / setup' and 'Normals / final'
"Normals / setup" Group. The cheap way to do it is to throw various layers from diffuse on top of a gray background. Adjust the layers and then normal map filter it. I stick a 50% grey background layer on the bottom with the various layers from diffuse added on top BUT one by one I'll have just one of these layers showing along with the background and then edit the layer/background to produce a good normal and then throw that into a group called 'Normals / final'. At the end you then have multiple normal maps and can easily change the intensity of each layer by simply changing the opacity. Instead of going back and changing the original layer and filtering it again.
Sunday, 20 January 2008
Education : no18 'Creating painted wood'
Really nice and simple tutorial here on achieving an weathered paint effect on wood from Methodonline.
http://www.methodonline.com/painted_tutorial.htm

Really nice and simple tutorial here on achieving an weathered paint effect on wood from Methodonline.
http://www.methodonline.com/painted_tutorial.htm
Friday, 18 January 2008
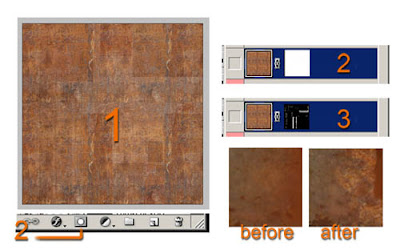
Education : no17 'masking in'
With many textures you need to add general dirt, rust, moss, chipped wood etc. Quick example here of how I go about these.
1. Fill you map with your texture. So here I have just stuck in a photo of rust and healed/cloned it around so that it fills the map. If you're only generally bringing this texture into areas then you can get away with this layer looking tiled other wise just spend a bit more time making sure no obvious shapes repeat etc.
2. Click on Mask. The mask shows as 100% white, make sure to click on the white square in the layers window. Invert (Ctrl & I) to make it black and your rust will vanish.
3. Now you can go into specific areas and with a soft white brush gradually bring it back in.
Doing it this way gives much more control.

Monday, 14 January 2008
Random : no5 'Update'
Back again. I'll be doing another round of updates over the next few weeks so if anyone has any questions or ideas of what to cover then drop me an email or add a comment. Thanks.
Since last time Unreal 3 has been released and so hope to update my website soon. The only other game that we can really talk about it a sort of MMO low spec affair on the PC. This set of screenshots show the texturepass for village buildings that myself and another worked on. For more information of the project you can go to http://awomo.com
Subscribe to:
Posts (Atom)