

This is a useful trick for complicated environment meshes. I will use a box for this example to make it as straight forward as possible. First of all you need UV channel 1 to be mapped as usual and also need to have channel 2 unwrapped where no polygon is overlapping and has its own space (really cheap and nasty way to do it is to 'unpack uv's' in unwrap editor in Max). Add new material to your mesh (everything you want this effect on should be atatched as one mesh) Add a gradient map into the diffuse slot, feel free to play around with the settings to get the effect you want. Add a UV map, align it correctly and rotate the gizmo if needed in order to change the direction of the gradient. Now press zero key to bring up render to texture and render out a diffuse into map channel 2.
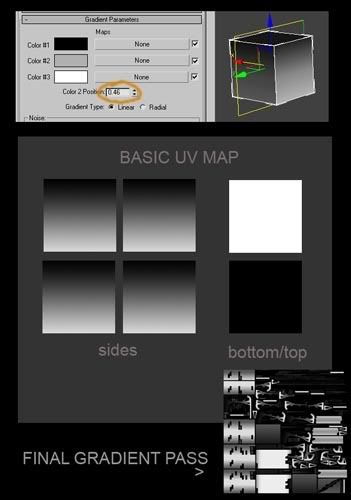 I have photoshopped the 'basic uv map' to show what you essentially get at the end. If its more complicated you'll get something like the example shown in bottom right. Now you can use this layer in Photoshop as a mask for dirt/grime/rust/moss. In max you can add noise by playing with the settings to make the gradient less perfect but you can also do that in Photoshop in various ways.
No comments:
Post a Comment