Education : no16 'AO / Lightmap'1. Throw in skylight, plop. 2. Press '9', turn on light tracer.3. Select Low poly and press zero key for the render to texture dialogue4. 'Pick' High poly object5. Make sure your low and high poly 'fit' each other well. If not then enable projection cage, reset and scrub the 'push' so that you push the cage slightly past the low poly.6. 'Add' lighting map, setup your filename and location etc7. Hit render
You will get a map similar to the one below. Blend it into your texture psd. (see what blend mode works best for you)
Its vital to do this with all texture passes nowadays, if not your stuff will look dated. Unless you spend ages painting all this detail in, correctly.
Random : no4 'Graphics challange'
Here are some images from popular games of the past. It's interesting how people instantly know the answers from such little detail. I put this in a forum and within the night they had all the correct answers so it isn't impossible. What really blew my mind was 'C' and how many instantly knew which game it is from even though there is very little detail at all.

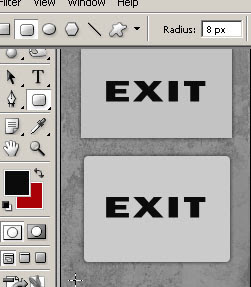
Education : no15 "Rectangle tool"
Top sign is your typical boring rectangle. Using the rectangle tool you can change the roundness of the edges by adjusting the radius option that sits at the top of the screen. Easy.
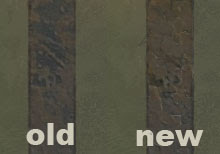
Education : no 14 'Extra detail in spec maps'
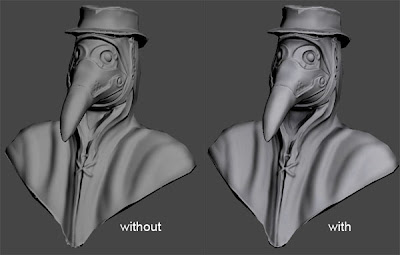
1) Don't just turn the diffuse into a spec map and be done with it. In many cases adding an extra spec grunge/dirt map like this within your spec map only can really create much more interesting and realistic textures.
2) On the left is a simple diffuse to spec conversion but even with the edges, add 'unique to spec only' brightness to it as seen on the right.
Random : no 3 'CGTalk UGAC switch/reversal Competition'I'm currently having a stab at this challenge. Have to take an exsisting character/setting and change the style/setting/sex etcI'm going with a modern day take on the 'plague doctor' figure from the 17th century.I've been going over the design for quite some time and finally came to this design, You can see how I got to this design and check out any progress by going to the following link,
http://forums.cgsociety.org/showthread.php?f=39&t=537843
Career : no1 'Introduction'
Today marks the anniversary of my second year working for my current (and first) games studio. So it seems fitting to start this new topic today. I remember when researching how to land a job in the games industry and on reflection I made quite a few mistakes that I'll share to those who are currently or about to look for their first job. It's not meant to be a 'This is how you get a job!!' series of articles (I'm crap at it anyway, took me 30+ attempts to succeed) , its just what I experienced and how I approached it. Over time I hope to go over education, cv's, interviews, job searching, recruitment agencies, portfolio, website etc So for now just a lighthearted reference to quite possibly one of the more influential pieces of advise I received at University which oddly enough came from a Pixar seminar held by Mark Walsh and Rob Russ. During the Q+A one student asked how they can get a job at Pixar. They replied for quite some time about the great lengths you have to go to land the job, how you have to be mega super amazing, how you have to know this and that and how you HAVE to do this and that as well as this. Then at the end they say '...or, you could find the next Pixar'. That was one of the reasons why I looked into and considered the outsourcing industry. I saw it as a upcoming area since at the time we were approaching the Next Gen era where I knew most developers would eventually have to use outsourcing for the big budget games.
Of course I did apply to all the obvious studios as well as the smaller ones but thankfully I also looked into the idea of something more, different. It was quite a risk but its payed off, I can't think of a better place to gain experience. Where else in under 2 years could you be working on your NINTH title?
Flashback : no2 'Gears of War texture Part 3'Another example of not enough definition. Also structure made no sense at all.
Flashback : no2 'Gears of War texture Part 2'
In area 2, yet another area that has not been defined. This time it's a hard edge.
Random : no2 'Wacom tablet'
Starting using Wacom tablets in 2003. From a texture artist point of view its good practice to use your pen for work outside of texturing from time to time. Here is my official first stab at painting with a tablet pen. I think its ticking all the wrong boxes here including design, perspective, colour scheme, lighting, defining areas etc. Then below is my latest example of wacom skills which was for a personal project.


Flashback : no3 "Overlord"
The images below are the property and copyright of both Triumph Studios and CodemastersTwo textures created for Overlord meshes (mesh created by another Streamline Artist)
Quite possibly my favourite project to work on so far. It wasn't that technical, had a simple engine and it was all about painting skills. The textures were usually about 60-70% handpainted and only 30-40% photo work.


